The next repair will show how to upgrade a Mavic rear wheel that do NOT use QRM+/QRM SL technologies, just the standard QRM hub, to a different Shimano or Campagnolo freehub type. It’s also helpful if you just want to service the hub to clean&refresh with oil the pawls, replace bearings and so on.
Road wheels cassette-freehub interfaces are not universal. If a rider changes his mind and decide to switch from Shimano/SRAM to Campy and vice versa on his equipment, he will have to decide what to do with the wheels. Get a new whole wheel or replacing the freehub are the options.

Mavic freehubs are a ripoff. An Aksium wheelset is around £150, £90 for just the rear and… £40 for the freehub! Campagnolo left, Shimano right
Mavic entry level wheels do not implement the famous QRM+ micro adjustment features, just the standard QRM design. As a result, the hub construction is totally different affecting how to precisely tweak the bearings or remove the freehub body, for example.

Top: QRM standard hub assembly with just a large hollow axle type. Bottom: QRM+ hub diagram that implements and axle end and a screw type axle
If you type on YouTube Mavic freehub removal or Mavic freehub service you will come across with some videos about how to dismantle it. But nobody has considered to do it with the cheapest version of the FTS-L hub, or at least I have not seen it.
In this year 2013, Mavic offers three road models (Aksium S, Cosmic Elite, Ksyrium Equipe) and one off road (Crossride models for 9mm axles) with the cheap hub and axle version.

Aksium S, Ksyrium Equipe, Cosmic Elite and Crossride QRM standard wheel freehub
The procedure to take apart the freehub is similar in all of these wheels. Even if they belong to different seasons. Mine is the Aksium Race model sold during 2010-2012.
We can recognise a QRM standard hub wheel if there are not small holes to fit the Mavic specific hub tool in the left flange of it. Otherwise you can spot a 17mm hex nut on the right axle end. On QRM+ this nut is circular.

Mavic R-Sys rear wheel
We need a stiff/long 5mm hex wrench and one 17mm hex combination wrench for the freehub body removal.

Park Tool 5mm P-handled hex wrench and 17mm socket type tool. It appears 15mm engraved but in the other side is also a 17mm one
Fit the 5mm key inside the axle. Grab it with your left hand and keep stationary the axle. Turn only counterclockwise the red tool. Make sure you fit the wrench straight not to damage the nut. If you use an open end spanner it is likely to happen that the tool will slip under preassure. My advice is to get a combination wrench where you can hold the nut in all of their 6 sides with the box end of it.

Undo with your fingers the nut once is loose and keep it in a safe place. A magnetic parts tray is perfect for wheel repairs.
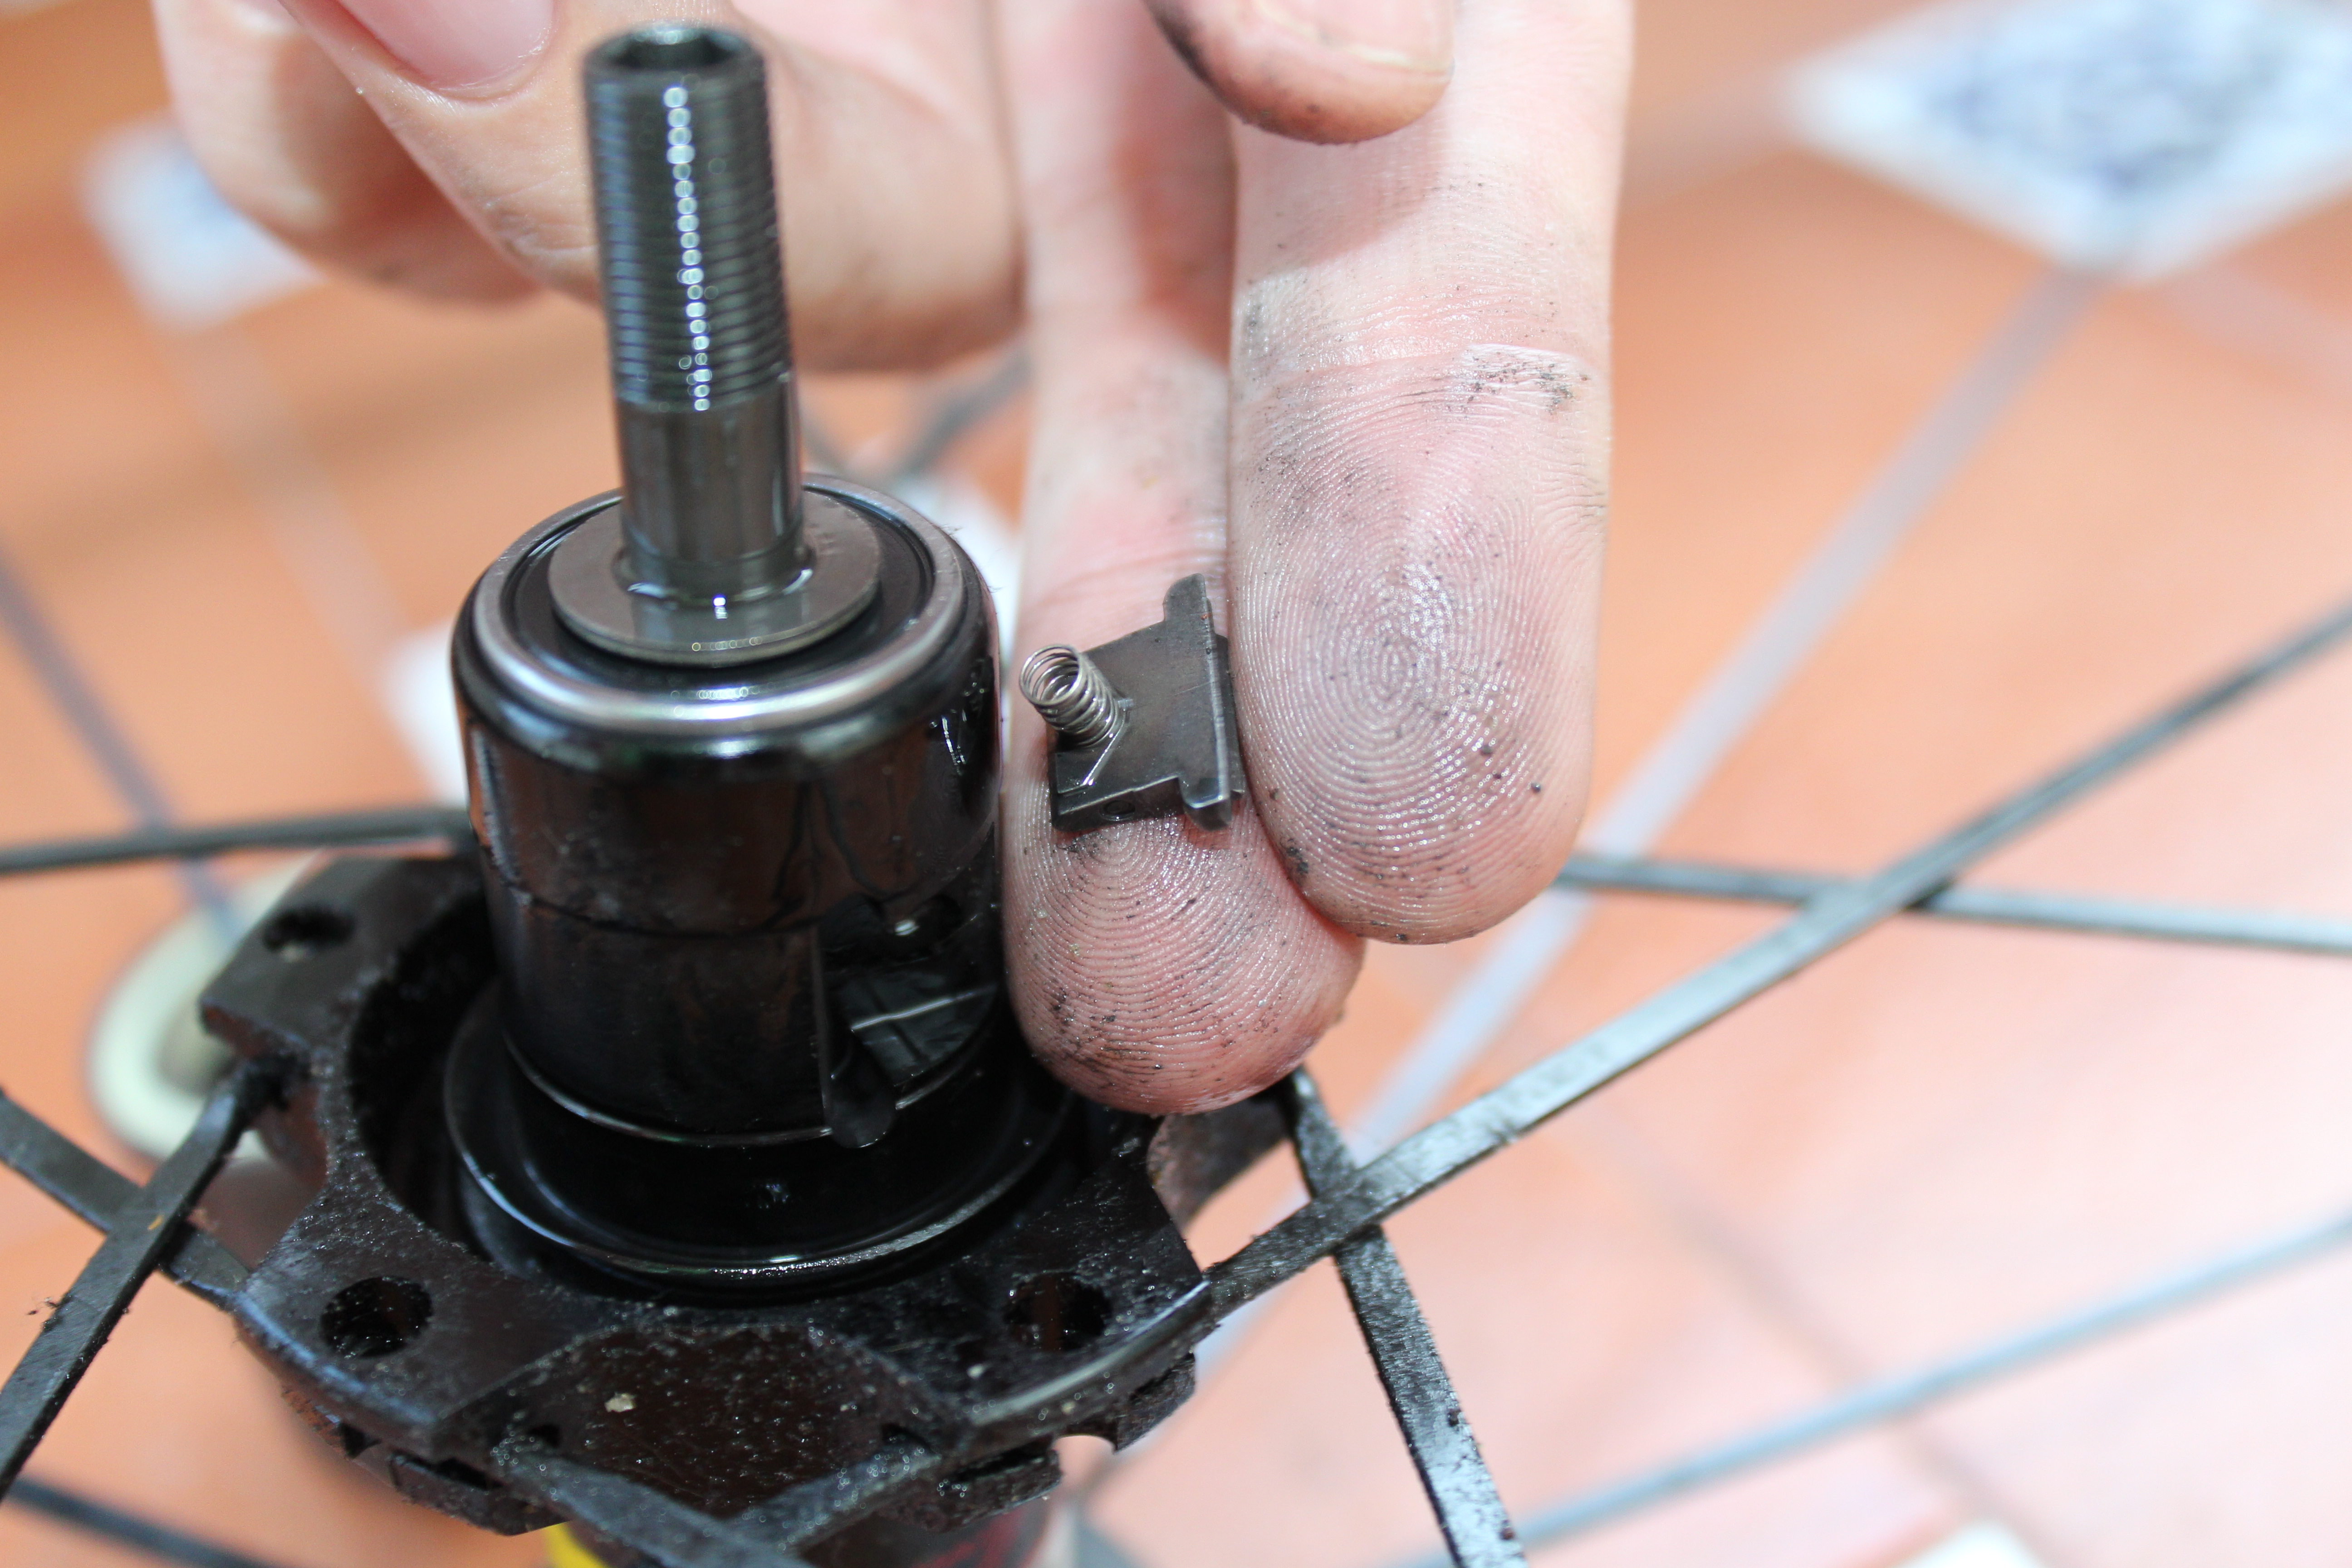
Shimano M10 freehub units need a specific spacer to fit 8/9/10 cogsets compatible with Shimano or SRAM systems. Remove it to have better grip while you are lifting with your fingers the base of the hub body. Do it slowly. If you are lucky none of the two pawls will pop out.
The last picture tells that one off them did not stay in place. Nothing mayor as you will have to double-check them after swapping over the bodies
By the way, the removal and installation process of the Campagnolo ED10/ED11 freehub is identical to the Shimano M10 version.
After taking off the freehub body clean the inside and the pawls. You can use light mineral oil. If you are desperate lube it with chain oil but remember to clean it regularly.
. In my case everything was spotted on as the wheel has only spinned for 500km
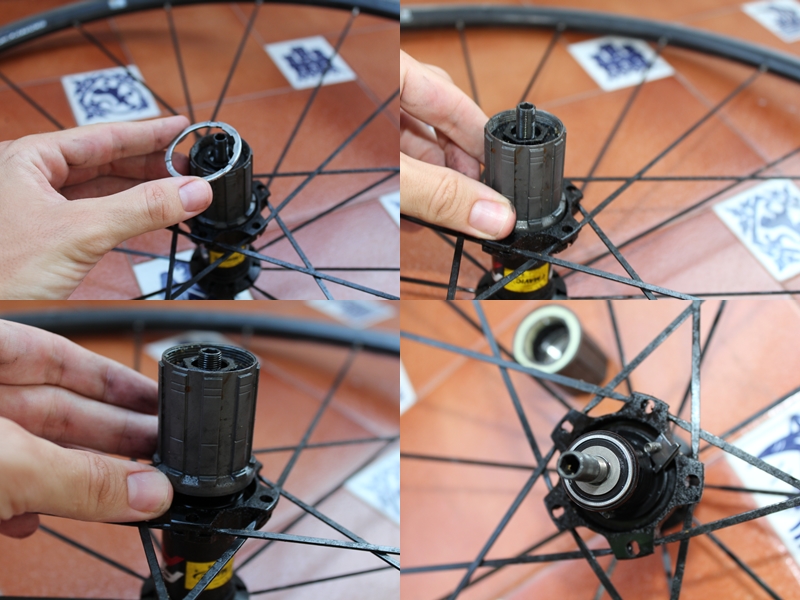
Notice about the existence of the washer in the next mosaic. It is in between two bearings, the one inside the freehub in the axle end and the one in the hub shell that appears in the picture. I reckon it has the right dimensions to fit the width of the bearing units. We need it to remove any undesirable play.
Fit both pawls securely. At this point, choose the freehub wanted.

Never install the new freehub without the washer. It must be fitted like in pics 2 and 3
Compress both pawls with you left hand so that you can slide in the freehub body with the other one till the end. Then thread the nut back.

Use the same tools to secure the hex nut properly to10Nm by fixing the blue one in place and turning the red one clockwise
After all we have the wheel in working order. This repair should take around 5 minutes. The time necessary to grab the tools.

Mavic Aksium Race 2012 with Campagnolo ED10 freewheel
The new wheels in the 2013 range feature a new axle size and thus a different freewheel bearing dimension. On these wheels, freewheel bearing has an inside diameter of 9 mm (instead of 8 mm on earlier models) and the freewheel bearing protection cap is silver (instead of black on earlier models).
The old freehubs M10 M40592 and ED10/ED11 M40591, with bearing diameter of 8 mm and a black bearing protection seal are not compatible with the 2013 range.
The new models HG11 30871101 and ED11 30871301 feature both Shimano and Campy 11 speed cassette systems. A shouldered washer is included in the freewheel kits to ensure the compatibility of these freehub bodies with wheels marketed prior to 2013.
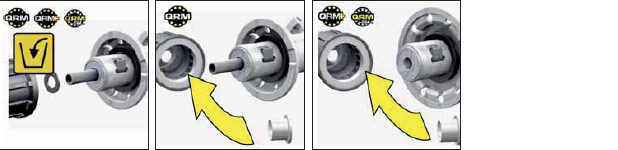
Discard the old washer and fit the new one provided in any type of hub (QRM, QRM+, QRM SL)
It must be used instead of the flat spacer M40066 to install these new freewheels on the old wheels, whose axle (QRM standard hub) or axle end screw (QRM+ or QRMSL hubs) have a diameter of 8 mm.
